With the Dynamic Field Integration settings complete in Cvent, you can configure your Meeting Request Form. This
article describes configuring the meeting request form.
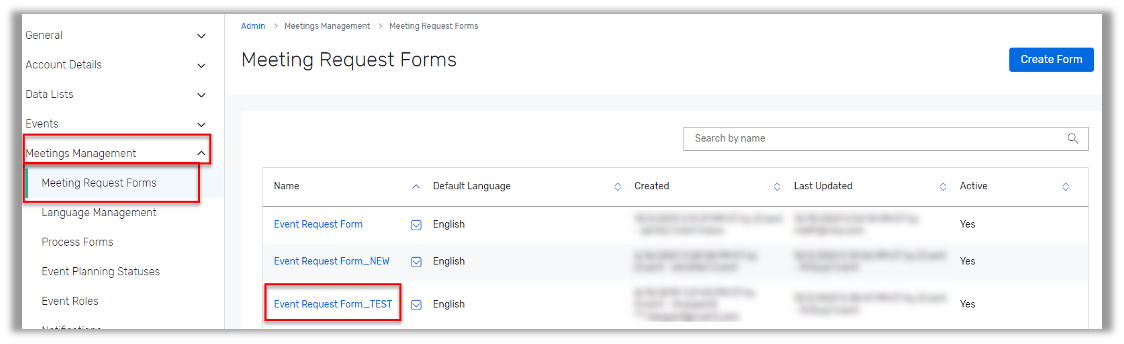
- Navigate to Admin > Meetings Management > Meeting Request Forms. Select the Meeting Request Form where you plan to use the Dynamic Field Set.
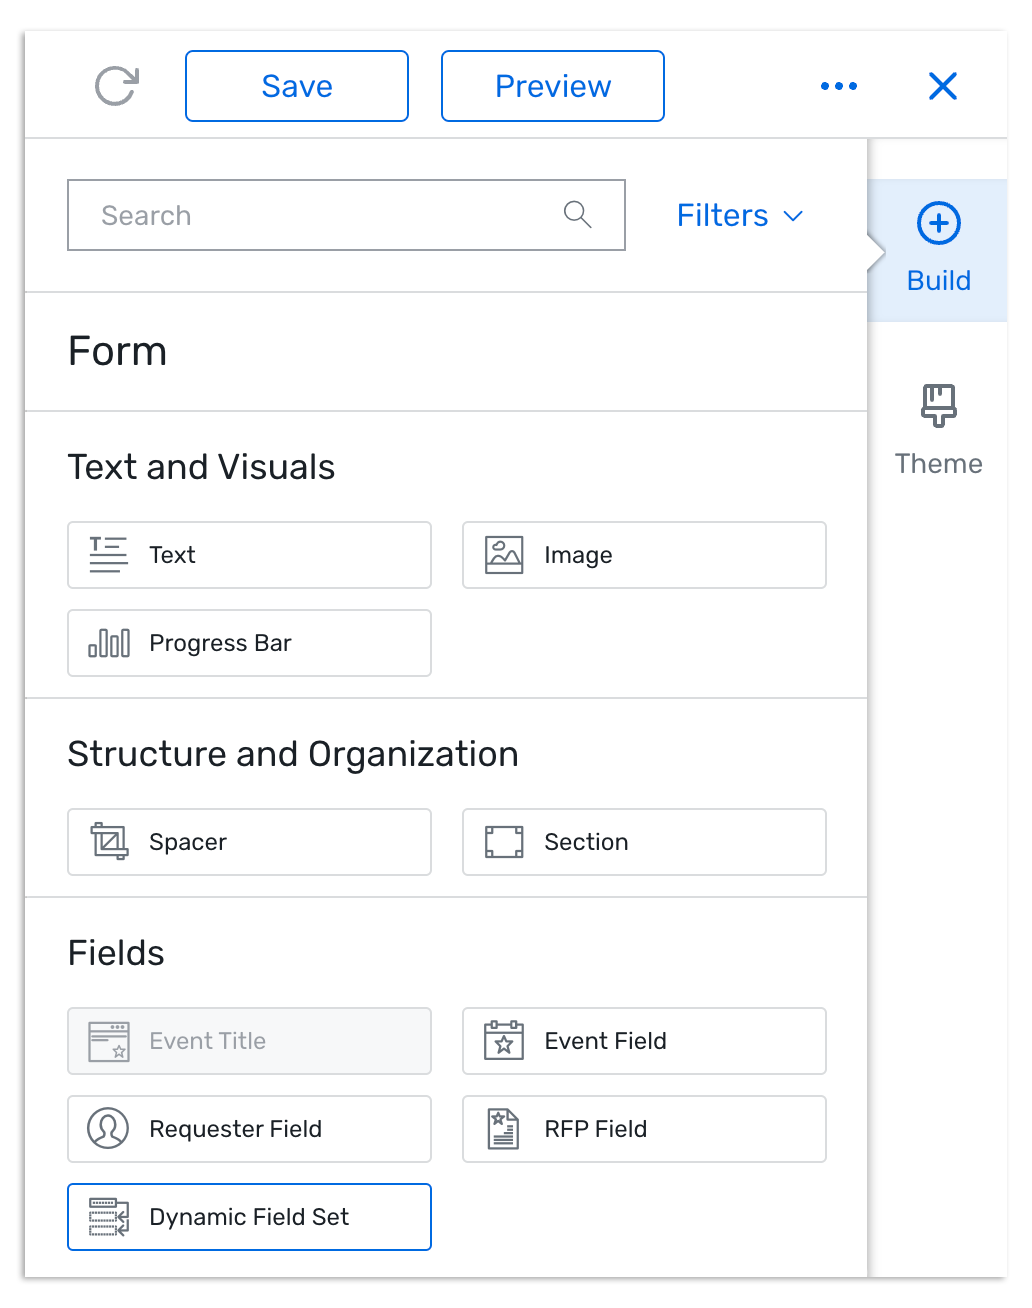
- Click Open Form Designer to access the Meeting Request Form designer.
- Open the Build menu and locate the Dynamic Field Set. Click and Drag it onto the page.
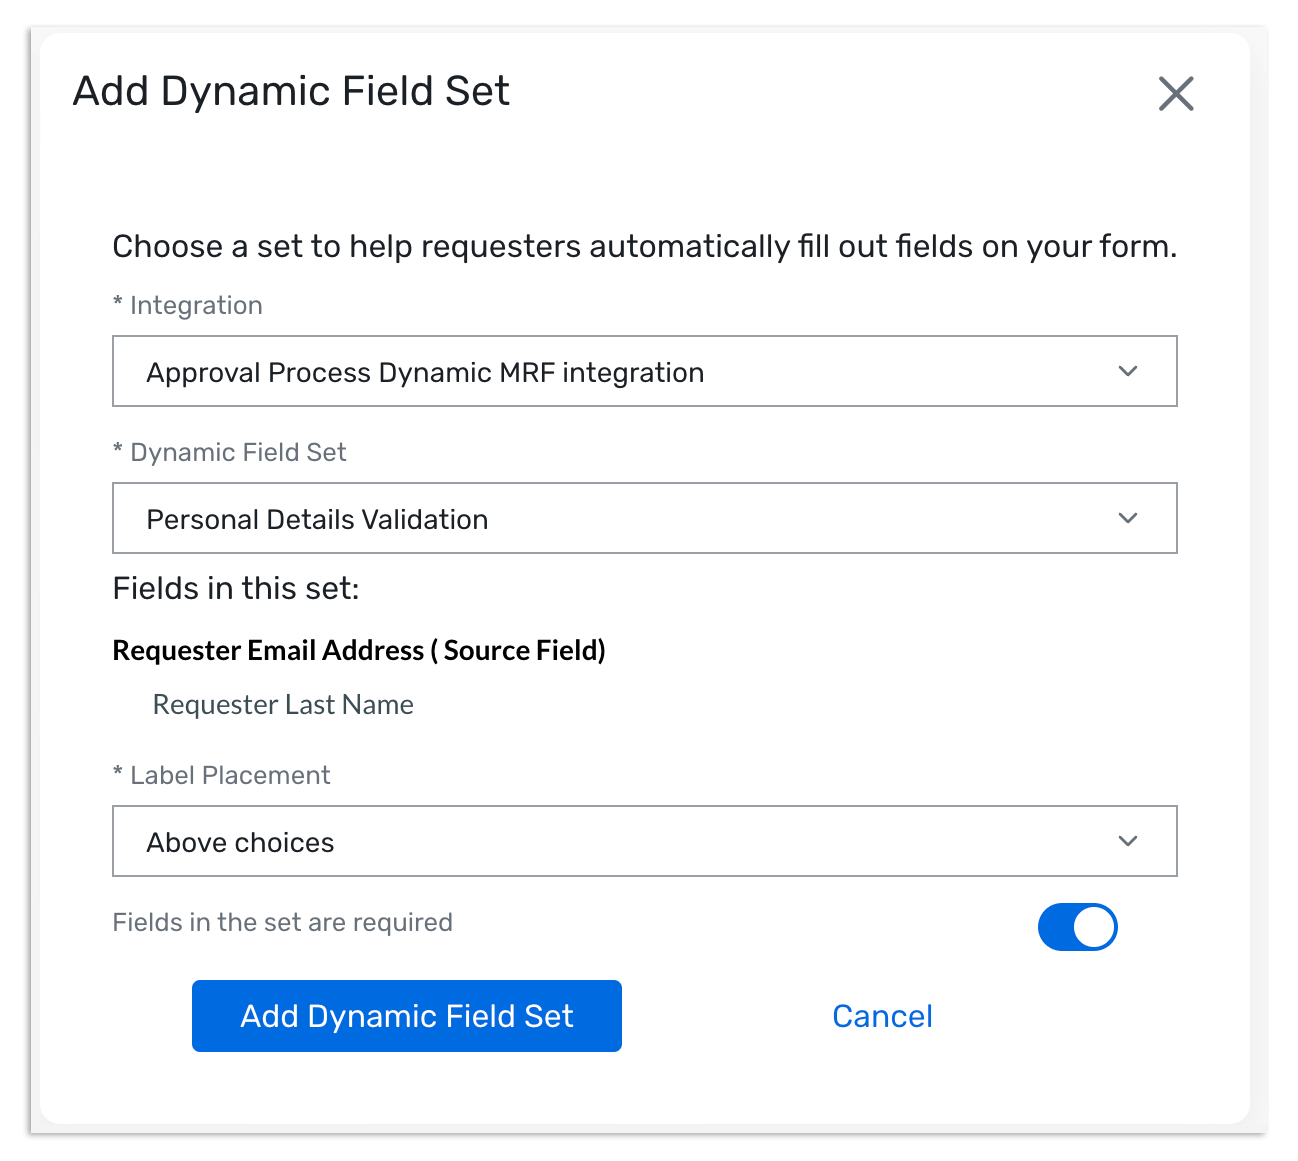
- On the Add Dynamic Field Set popup, configure the following: a. Integration: Select the integration you wish to use. b. Dynamic Field Set: Select one of the dynamic field sets you configured for this integration. c. Label Placement: Decides the appearance of the questions. Above choices puts the label above the field, to the left of choices puts the label to the left of the field. d. Fields in the set must be completed: Determine if the user must provide a response to the source field. Note that the user must input a valid value to continue if you require a source field. To avoid blocking a user from filling the form if they don’t know a valid value, you can add “N/A” or “BLANK” as rows in your data file. e. Click Add Dynamic Field Set.
The page now includes the dynamic field set. You can drag the fields to re-arrange them if needed.
Add more dynamic field sets if you need them, then click Save.
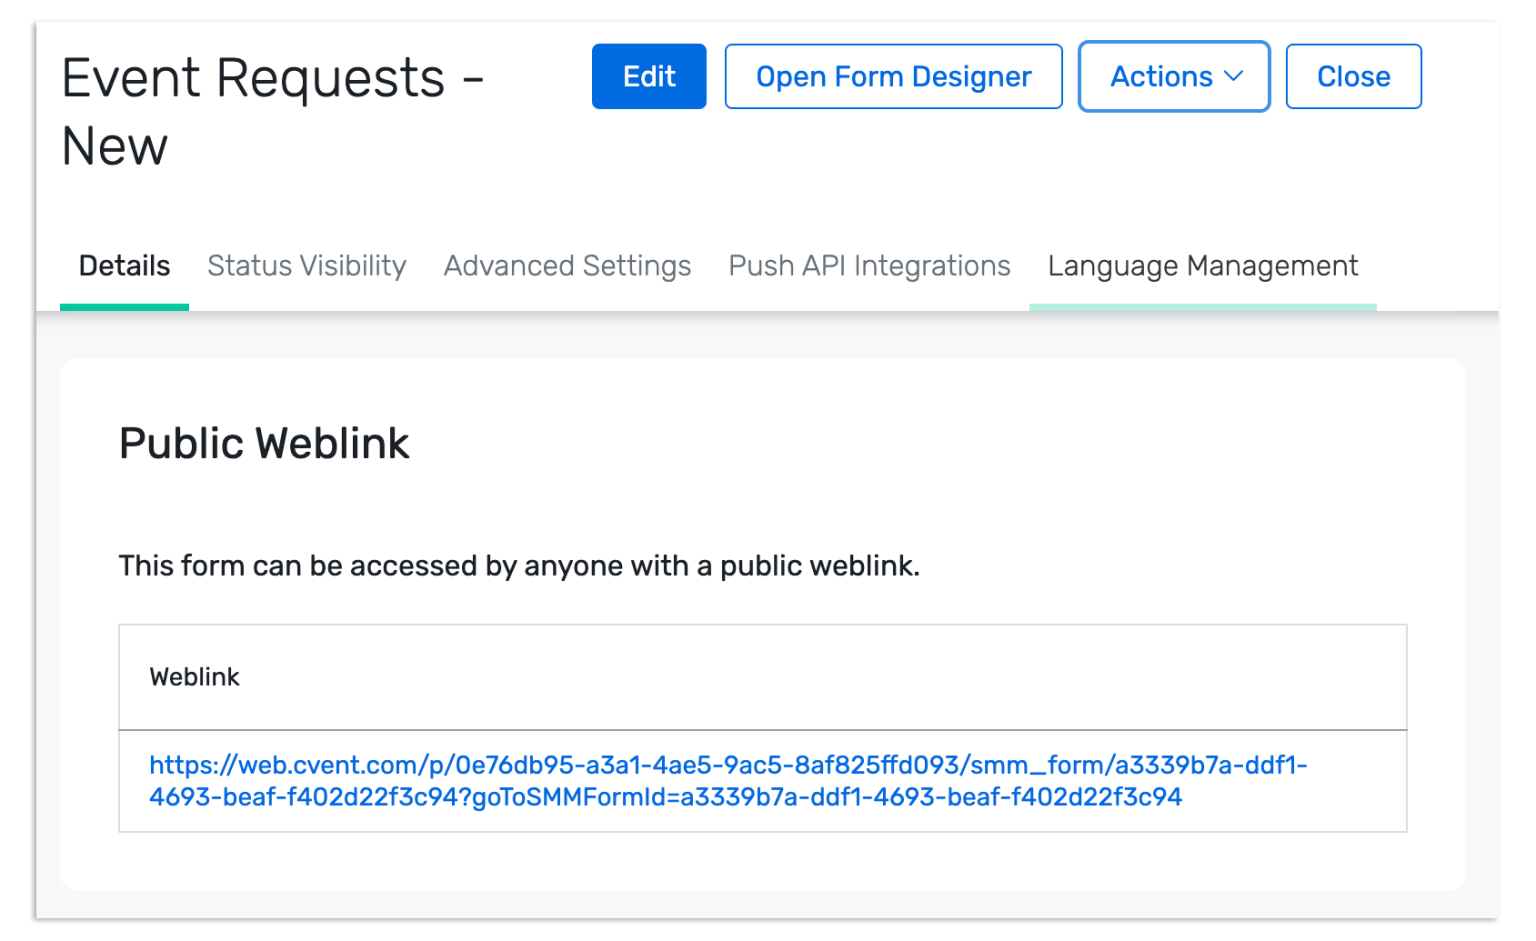
- Test the integration by exiting the form designer and accessing the Meeting Request Form via a public weblink or from an access portal.
When entering values into the source field, data auto-populates in the fields that follow within the field set, or the validation message will be served.
You have successfully configured the integration.
Last updated on